cse15l-lab-reports
Lab Report 3
This lab report will be implementing all of the Group Choices from Lab 5.
Streamlineing ssh Configuration
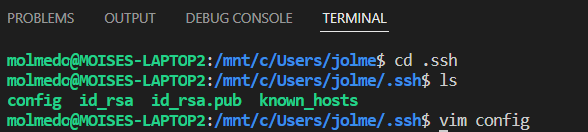
First a config file was created in the .ssh directory. The picture below shows the config file in the .ssh directory.
To edit this config file, vim was used, which is an editor that allows one to edit a file in the terminal. To use vim you run vim <file> in the command line, make sure you are in the same folder the file is in. Then press “i” on the keyboard.

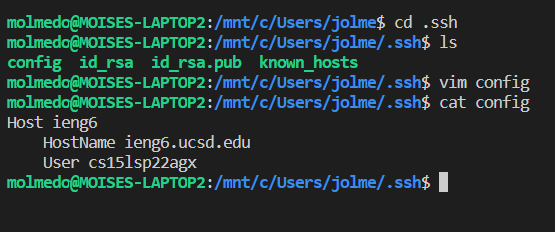
This enables one to edit the file. Once the edit is made press the escape button and type in :wq which saves the edits and exits vim.In the config file, a host is made, which can be anything. This will be typed in instead of the User name seen in the image above. The HostName is the remote server that will be logged into. The image below shows the contents of the config file after the edit was made:
Once this is saved, rather than typing
ssh cs15lsp22xxx@ieng6.ucsd.edu
in the command line to log into the remote server, you only need to type in
ssh <Host in config file>
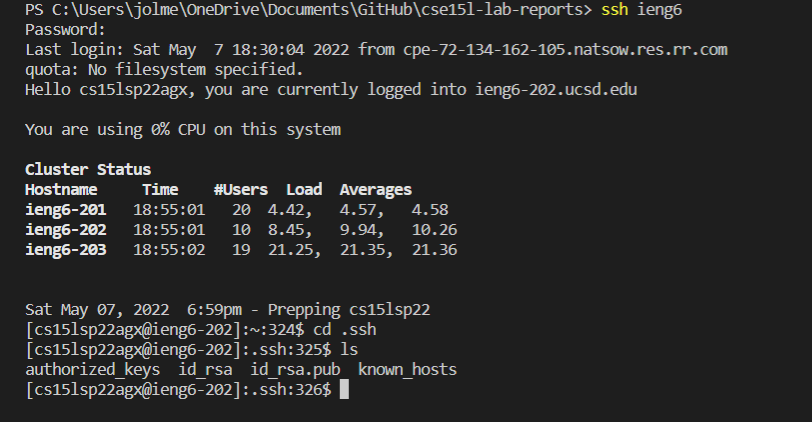
The image above shows logging into the remote server:
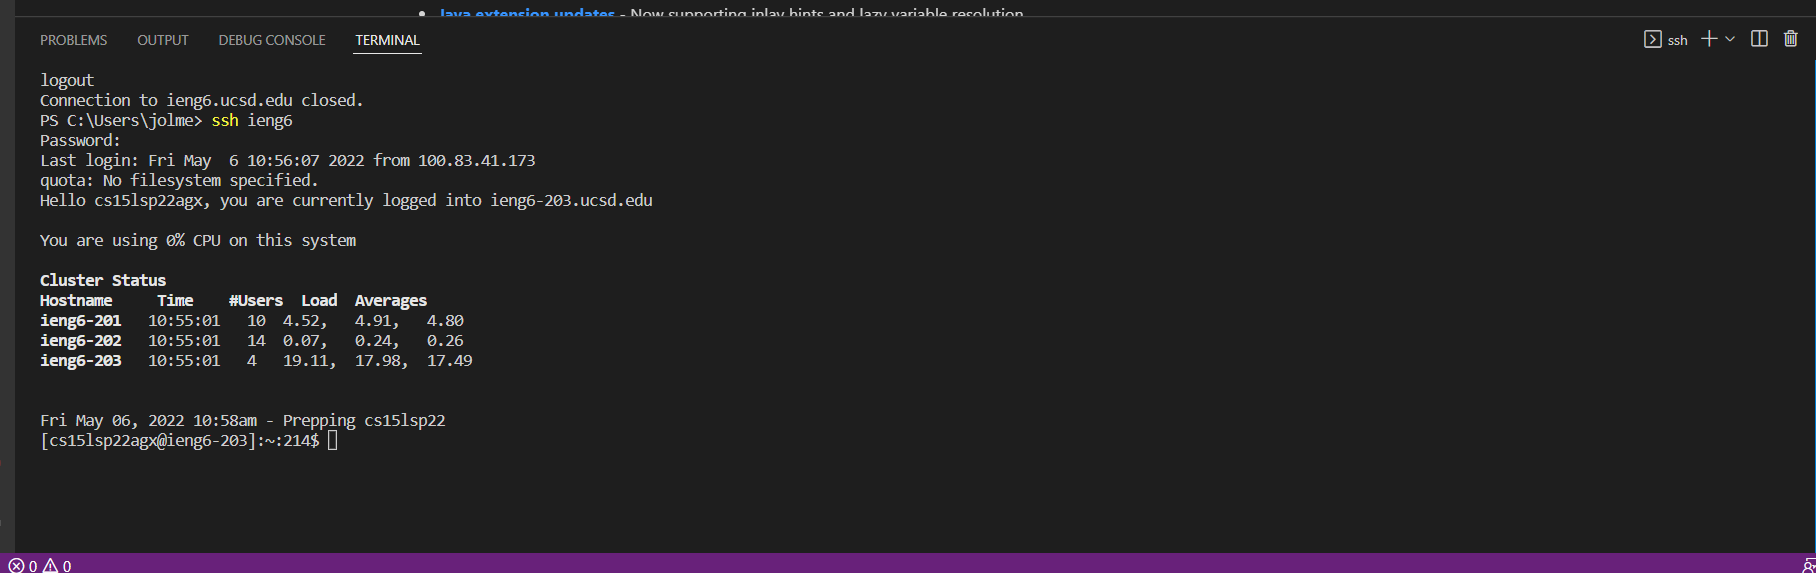
This makes logging in much faster and efficient!
Setup GitHub Access from ieng6
The second part of this lab shows the setup for Github Access from ieng6. In order to do this, the public key from the remote computer must be added as a key on GitHub. In order to get the public key, do the following:
>>> ssh-keygen
Generating public/private rsa key pair.
Enter file in which to save the key (/Users/jolme/.ssh/id_rsa): /Users/jolme/.ssh/id_rsa_github
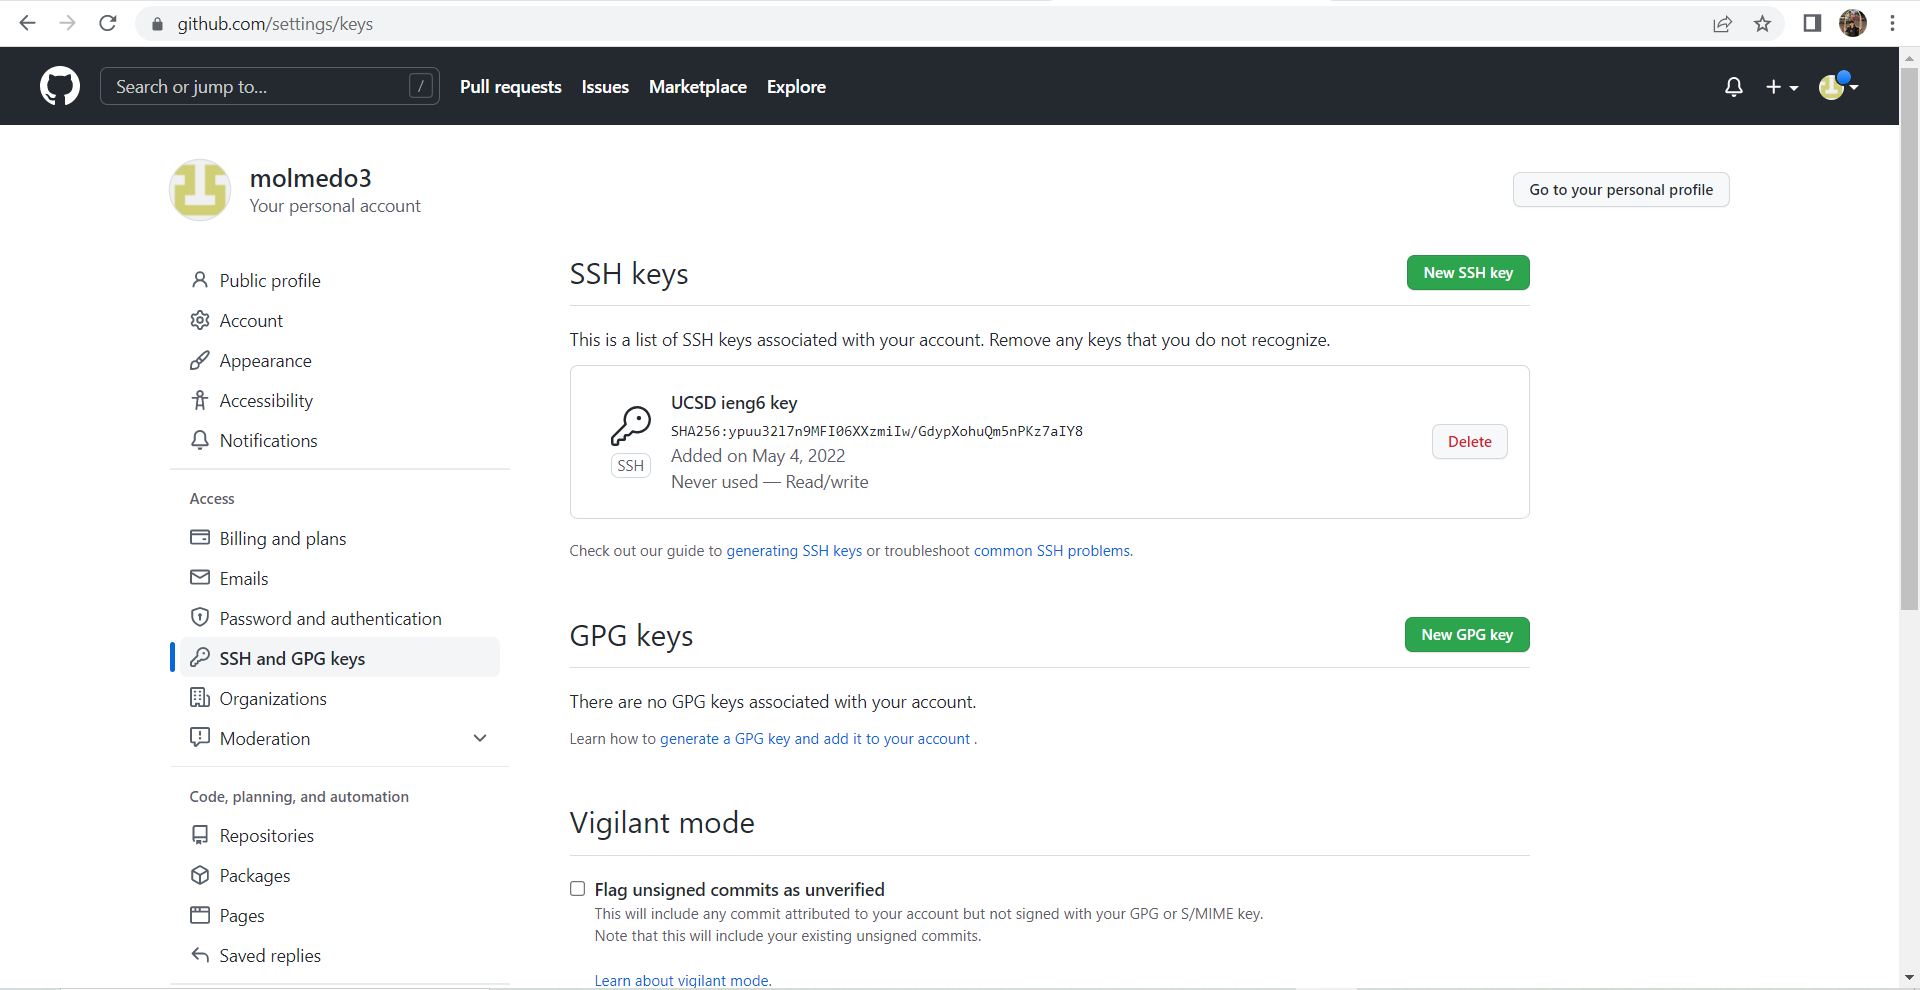
Once this is done, it should show the key, copy it, and go to GitHub, go to your profile, and go ssh keys, it is on the left side and paste the key in their. This is how my key looks in github
To show the key stored in the user account, I went to .ssh and typed ls into the command line. Here is a screenshot:
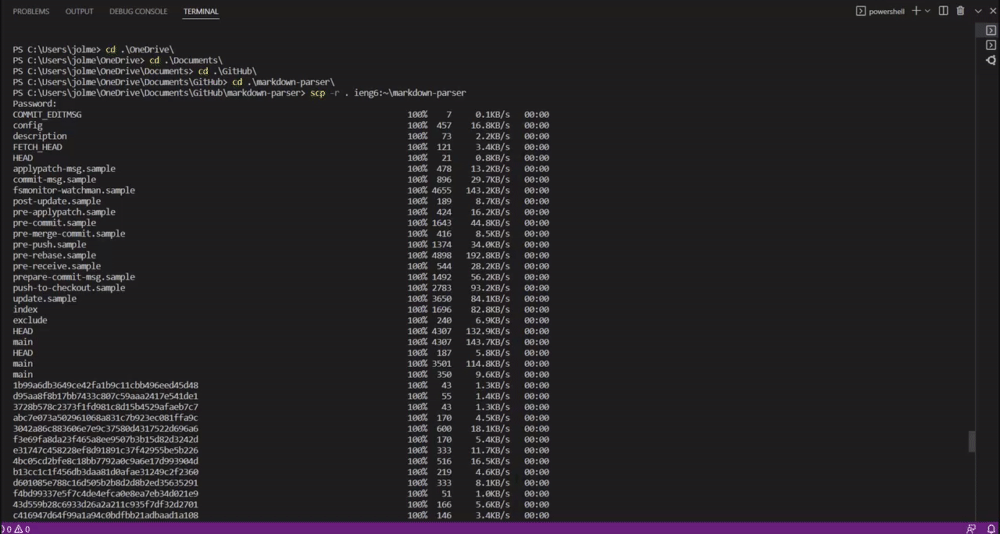
Copy whole directories with scp -r
For this last part to copy an entire directory and its contents,log into the ieng6 account and run the command
>>>scp -r . ieng6:~/markdown-parser
This causes all of the directory contents to be copied recursively. The gif below shows the contents being copied:
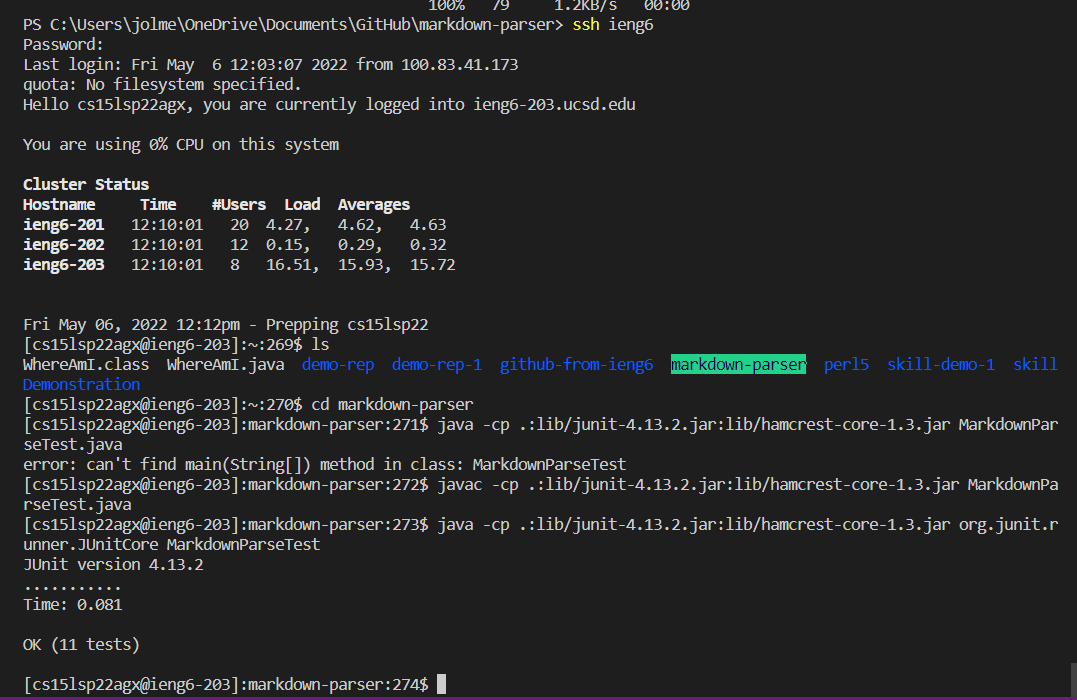
Once it copied over, I logged into my ieng6 account and ran the junit tests. The image below shows the logging into the account and running javac and java on the command line from the remote server:
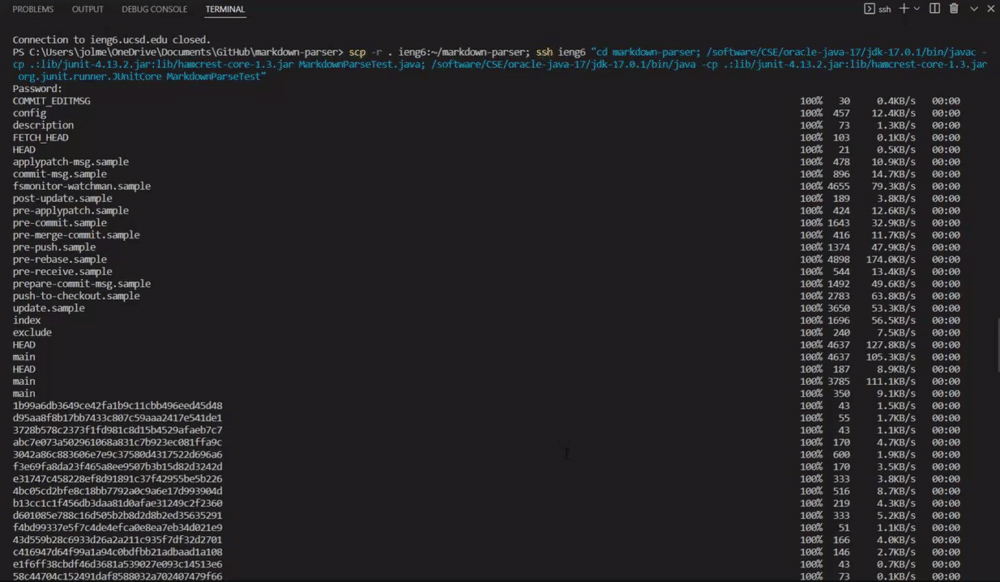
After this, I deleted the repository, in order to recopy the repository and its contents over, sign in, and run the test by running the following command once:
scp -r . ieng6:~/markdown-parser; ssh ieng6 "cd markdown-parser; /software/CSE/oracle-java-17/jdk-17.0.1/bin/javac -cp .:lib/junit-4.13.2.jar:lib/hamcrest-core-1.3.jar MarkdownParseTest.java; /software/CSE/oracle-java-17/jdk-17.0.1/bin/java -cp .:lib/junit-4.13.2.jar:lib/hamcrest-core-1.3.jar org.junit.runner.JUnitCore MarkdownParseTest"
This gif below shows this:
Doing this allows one to copy entire directories and running tests on the files in the directory much more effeciently and qui*cker!
NOTE: I could not do git push on my remote account.